|
"Modless" Interface of a |
|
Introduction
This article describes how to interface a Baofeng UV5 or UV82 and others but NOT the 888 to Allstar without modifying the radio. No modification of the radio is required! This is accomplished by simply plugging in a mic/earphone cable and fabricating an interface to the FOB. Many of the Baofeng radios have a superimposed DC level on COS (PL) active signal on the headphone output connector. This level is used to drive a FET to switch the COS lead to ground. If you do it the way shown here you will need to bypass the COS diode on the FOB and use usbinvert in simpleusb-tune-menu. This is easily done using the ARA-1 series of FOBS. An alternative would be to leave the diode in circuit and use a 10K pull-up to 5V on the COS line coming from the mod board. Using usbinvert also means if the earphone/mic plug is not inserted in the radio or the radio is not powered, COS will remain in the clear state.
Parts required
This project requires minimal parts. Here is the list.
- A perf breadboard
- 10K resistor (2) ***
- 1K resistor (2)
- 4.7K resistor
- 47K resistor
- 4.7uf 25V Electrolytic capacitor(2)
- .1 uf non-polarized capacitor
- 2N7000 FET
- Baofeng Earphone/Mic (cut to length)
*** Adjust as needed
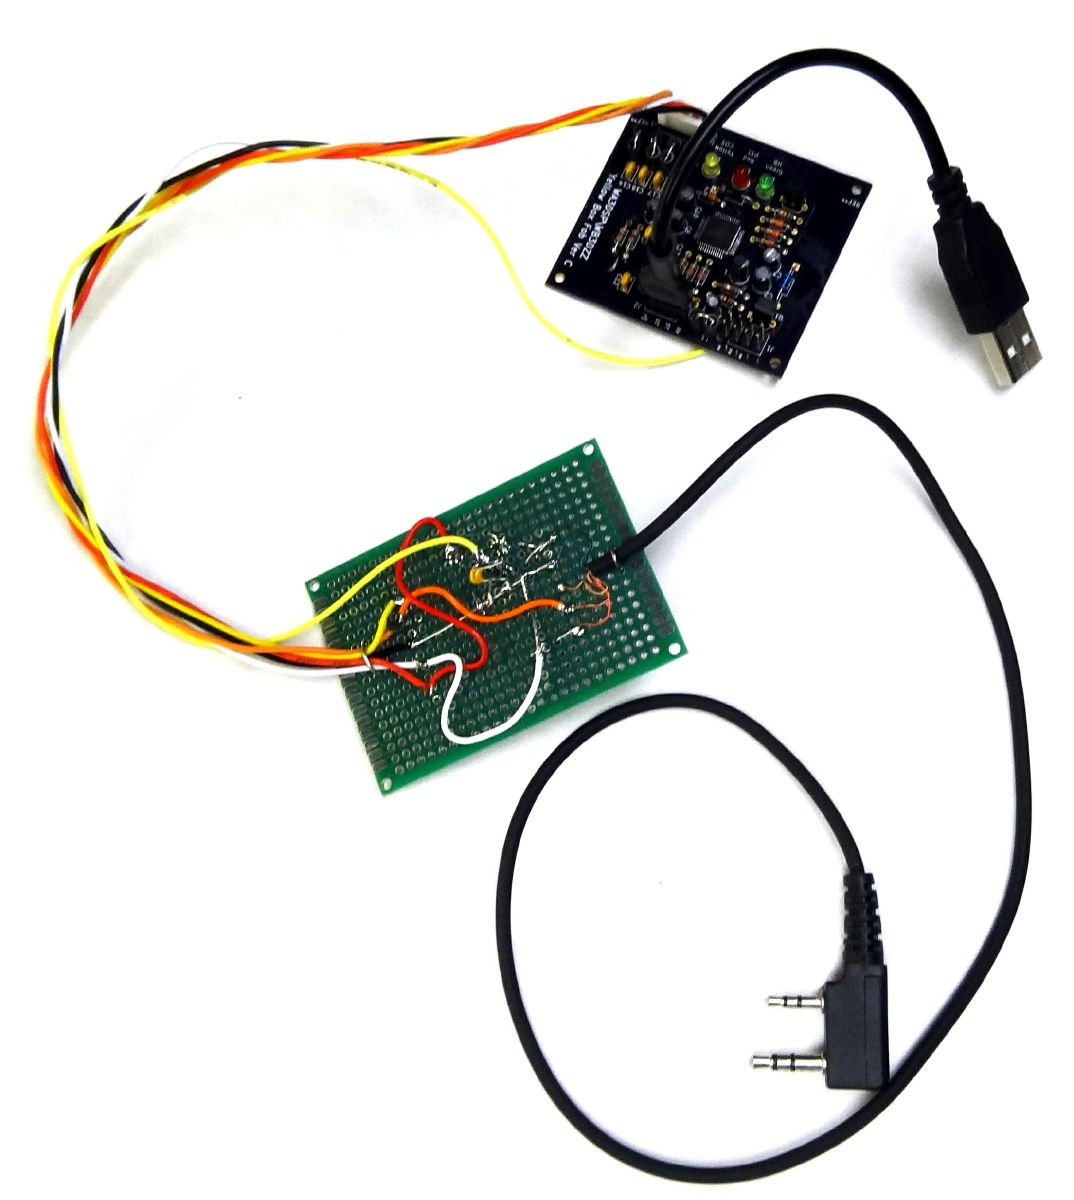
Modification Photos
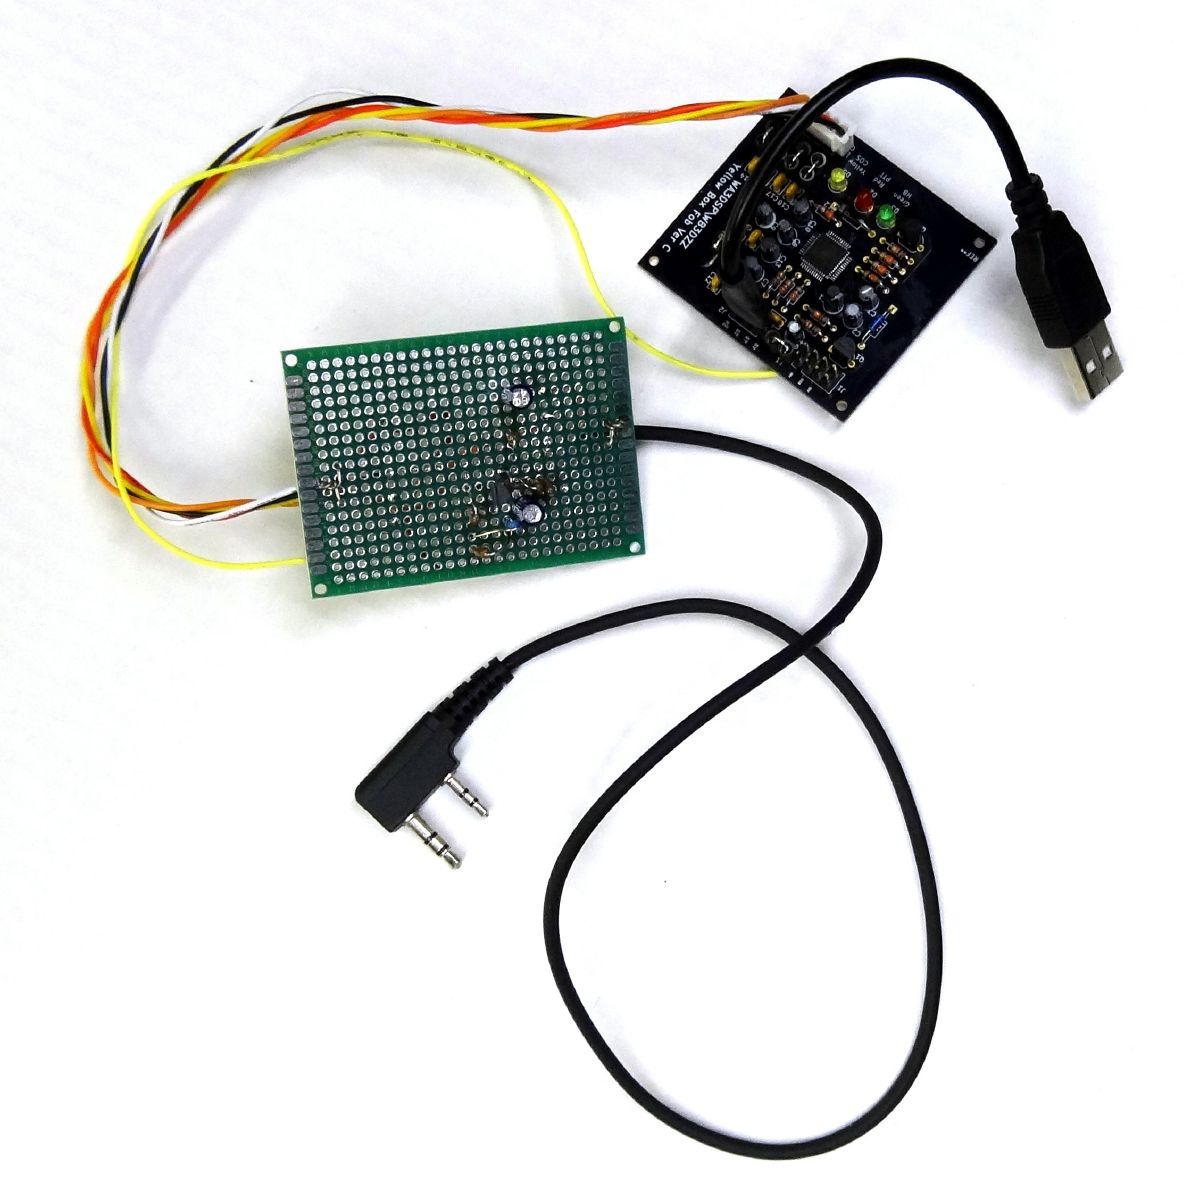
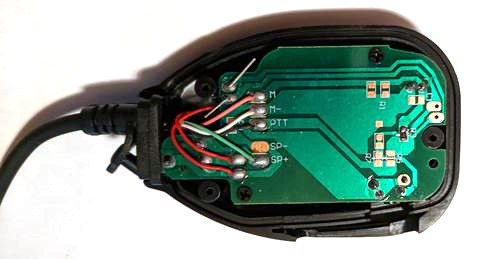
All parts can be mounted on a small perf board. The wires in the earphone/mic cable are very small and subject to breakage. Do not try to strip the individual wires. Use a hot soldering iron and solder to burn off the insulation and tin the leads. Secure the overall cable securely to avoid pulling the wires off. I just use a piece of bare lead threaded through holes on the board and twisted to make it tight. Parts in the schematic marked with an asterisk should be adjusted to accommodate the FOB you are using.
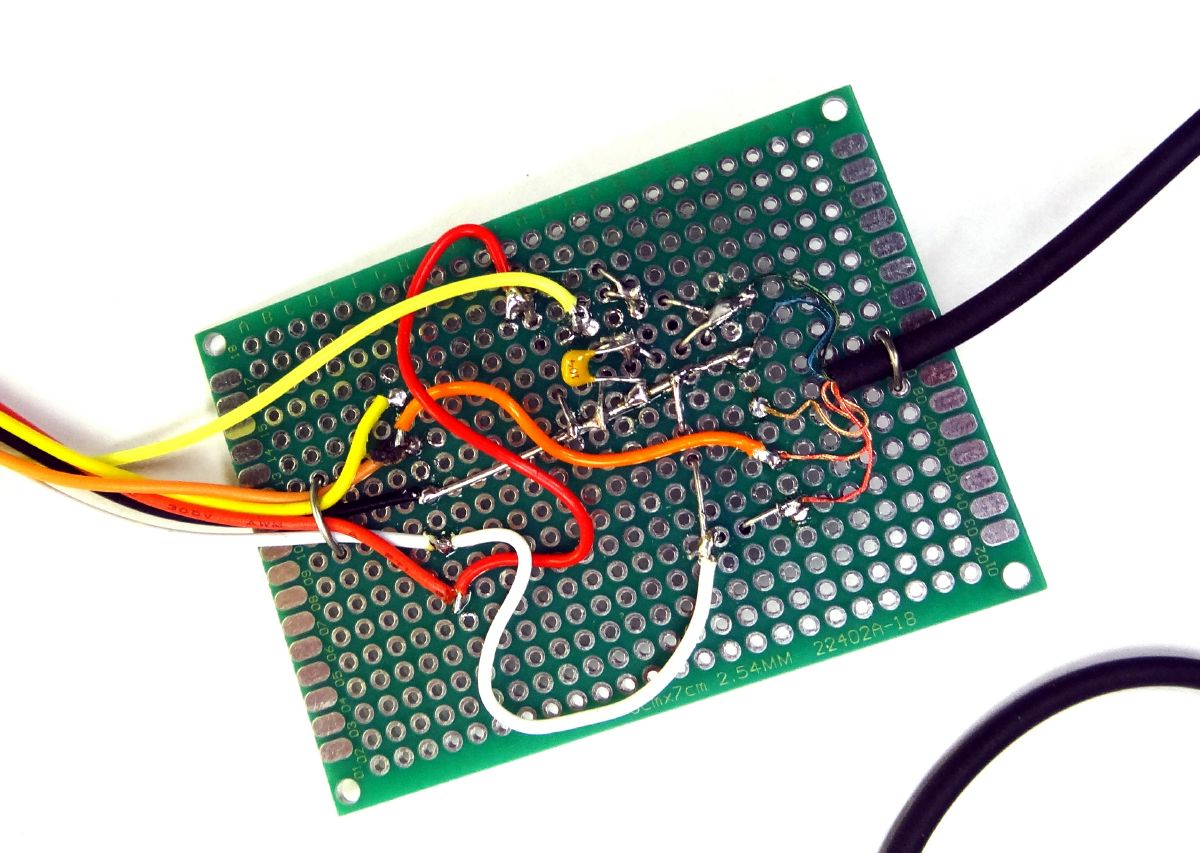
This closeup shows the component side of the board. This was a breadboard and many changes were made so it is not as neat as it could be. This shows the leads from the earphone/mic and their colors. Colors are sometimes hard to discern so you should ohm out the wires to the connectors to be sure. The wires to the board on the left show the colors from the ARA-1 FOB.
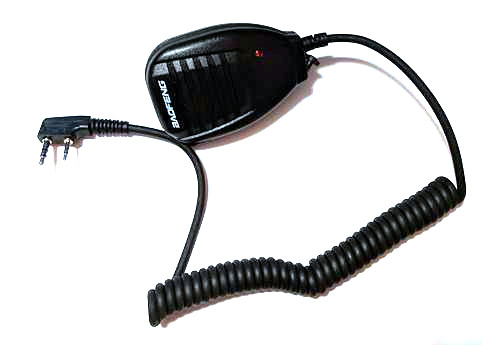
Alternative connection method
If you do not have the supplied earbud/mic or you want an easier way to work with larger and less delicate wires order this Speaker/MIC from Amazon which has much more robust wires. Unassemble the mic and remove the wires. The following photos show the assembled and unassemled mic. Either mark the leads or ohm them out to the plugs for proper connections. Contributed by WD9EQD.
Description of operation
Because the RX audio is controlled by the Baofeng's volume control it is important to set the volume point and make sure it stays there. I recommend a dot of hot glue which can be removed if necessary. The volume level should be kept low. If all the way down (before the off click) is 7 o'clock then put it no higher than 9 o'clock. Then adjust the RX level (item 2) in simpleusb-tune-menu. You should try to keep it around the 500 range. The RX side resistive dividers R3,R4 are shown as (1K/1K), R3 can be adjusted to achieve this range as describe below. You can also turn the RX boost on or off as needed. Turning the radio volume level too high can interfere with COS causing it to be erratic. COS is a DC signal superimposed on the RX audio from the Baofeng.
For the TX level adjust R6 shown as a 10K as needed to bring the TX level (item 3) in simpleusb-tune-menu close to the 500 range. Adjust R6 up to lower the level or down to increase the level as needed.
For the RX level adjust R3 shown as 1K as needed to bring the RX level (item 2) in simpleusb-tune-menu close to the 500 range. Adjust R3 up to lower the level or down to increase the level as needed.
This method provides good audio when adjusted correctly. Just remember to adjust the radio volume properly and lock it down so it does not get moved and change the RX level.
Links
© 2019 - WA3DSP